I have got some questions how the river and water was modeled on the Saguaro River Module, and I am happy to tell you how I made it. (Added Oct 14, 2011)
I will try to explain how this was done:
 |
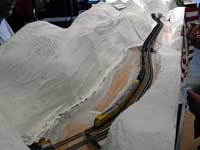
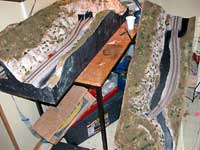
First of all, the base for the riverbed is plywood, and to simulate the slope of the river, I created the bed of smaller pieces of plywood, laying on the same level along the whole module, but each part were put on top of each other at the ends, as seen in the image below.
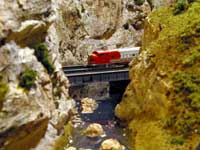
The water is modeled using the Woodland Scenics Realistic Water and Water Effects. After the base was painted black, 2 very thin layers of Realistic Water is brushed on the base. After it is dry, the waves are created using Water Effects applied with a brush. Read more below.
|

A sketch showing the principle to fake a slope on the riverbed. It looks like the track along the riverbaks has a slope and that each segment of the river is flat, with small changes in height for each section, giving the feeling that the water is flowing downwards.
Some images showing the different stages:
Read the whole story on the building blog on this site.
 |
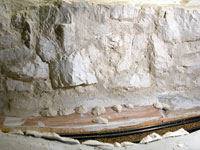
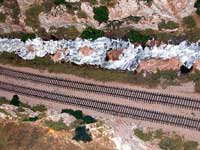
The riverbed is near finished, coloring of the riverbottom and installing of rockpieces in the stream can start. |
 |
Some rockpieces are in place, to be sanded flat on the bottom and glued to the riverbed. |
 |
The rockpieces ready for gluing. Here I should have waited finishing the sides of the riverbed, so the rockpieces had been better incorporated into the sides. But next time, may be?? :-) |
 |
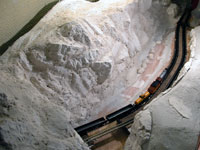
The riverbed is painted black, ready to glue on the pieces of rock. |
 |
The first layers are in place and are dry. The water could have been finished now, but I also wanted to add waves.
The water is modeled using the Woodland Scenics Realistic Water and Water Effects. After the base was painted black, 2 very thin layers of Realistic Water is brushed on the base. After it is dry, the waves are created using Water Effects applied with a brush.
|
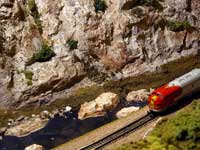 |
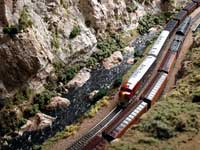
The river from another view, ready to have some waves installed.
I didn't need to paint waves, so I could have stopped with only this thin layers of "water", but wanted also to make some waves. |
 |
The waves are painted on with the using Woodland Scenics Water Effects product. Until it is dry, its look like milk, but when it is dry, its transparent. |
 |
Here the thinnest parts of the waves are dry. The white part still need some drying time to be transparent. |
 |
Here the river is completely dry. Some drybrushing with some light colors to highlight the waves, should still be done. |
 |
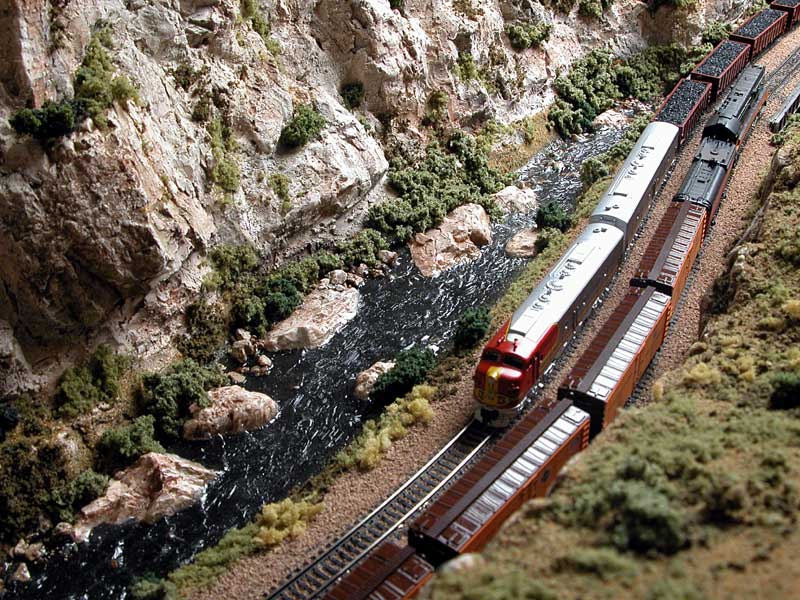
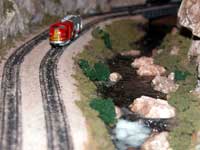
And I think the end result is good, even if I never finished the drybrushing of the waves. The AZL engines meets at the riverbanks on Saguaro River Module.
Read the whole story on the building blog on this site.
|